WEBHOOK SUBSCRIPTIONS ARE LIMITED TO 10 PER PJMID. But a single Webhook can simultaneous track multiple request IDs.
For more information on PayJunction account structures, see the PayJunction Account Structures guide.
Webhooks are an excellent solution for communicating data between different platforms in an asynchronous manner, however they can be difficult to work with in a local development environment. One solution to this problem is an easy to set up third-party tool called ngrok.
How does it work?
ngrok works by creating and maintaining a web socket between their service and your local server. When ngrok is first started on your server it will give you the domain address to point your web traffic to. Any traffic sent to this domain address will be forwarded to your server.
More information on the technology and how it works can be found on the ngrok website: https://ngrok.com
Step by Step Instructions
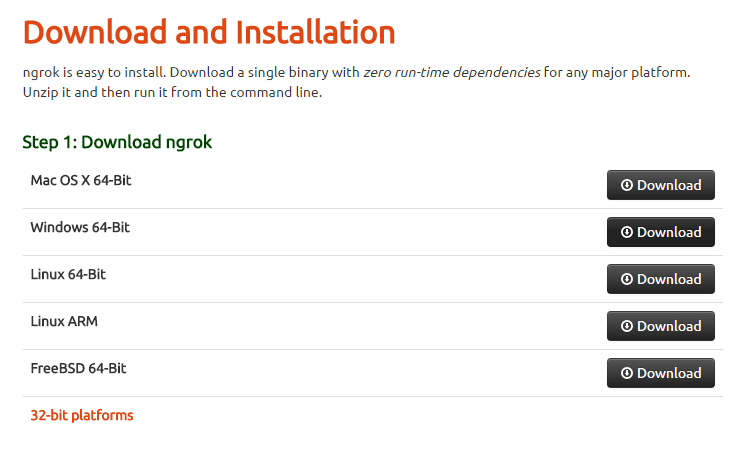
Step 1: Download ngrok
Go to https://ngrok.com/download and download the appropriate version for your operating system. For demonstration purposes, we are running a simple ExpressJS application on Windows which listens for HTTPS traffic at a specific endpoint and echoes the data to the command line to emulate a webhook listener. Therefore, we are using the Windows 64-Bit distribution.
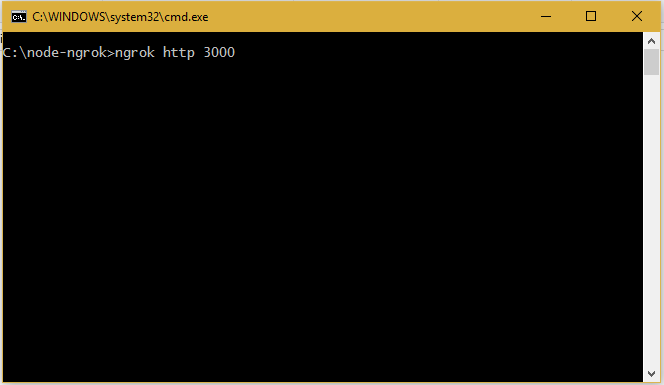
Step 2: Run ngrok
After decompressing the file, you can run ngrok on the command line without any further installation. The free and unregistered version of ngrok takes 2 arguments, the protocol to forward and the local port to forward it to. In this case, our ExpressJS testing service is listening on port 3000:
Note that you do not need to distinguish between HTTP and HTTPS traffic, both will be forwarded to the specified port on the local machine when sent to the domain given by ngrok:
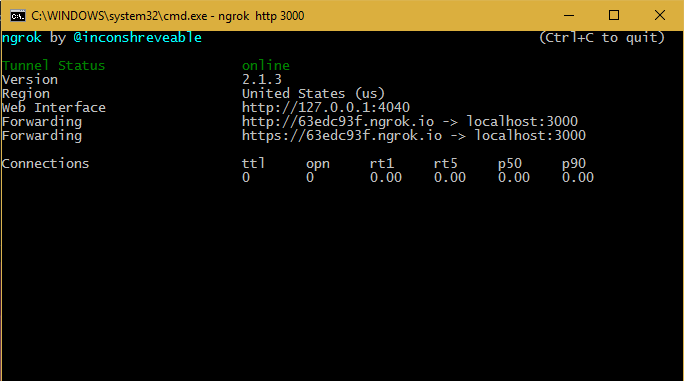
Step 3: Using the ngrok Web Console to monitor traffic
We can use just the command line application above, but ngrok comes with a much more useful tool in the web console now running on port 4040:
![]()
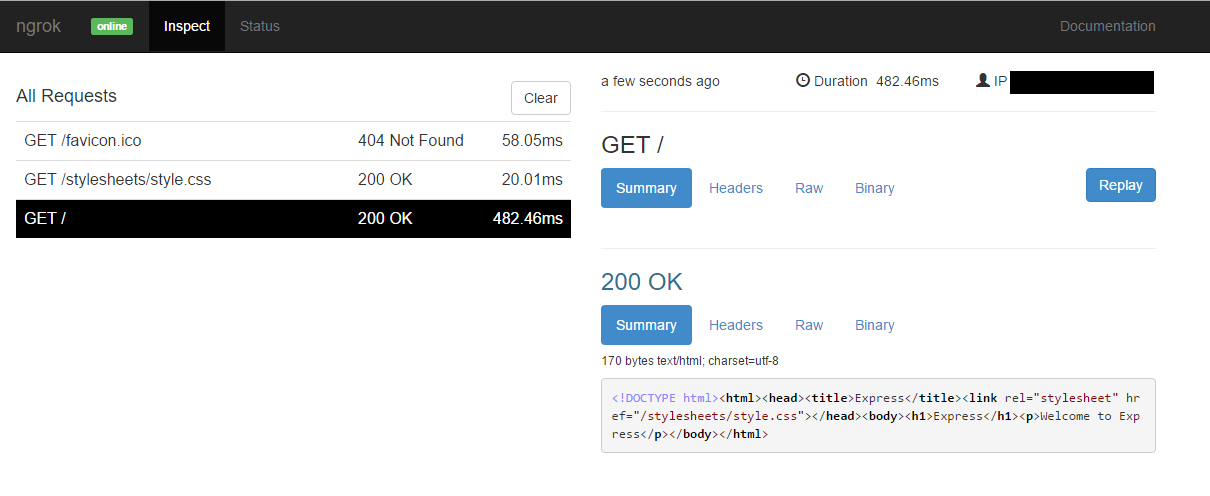
Just to make sure everything is running correctly, we can click one of the links it gives us and see the requests roll in through our new proxy tunnel:
Step 4: POST the Webhook to PayJunction
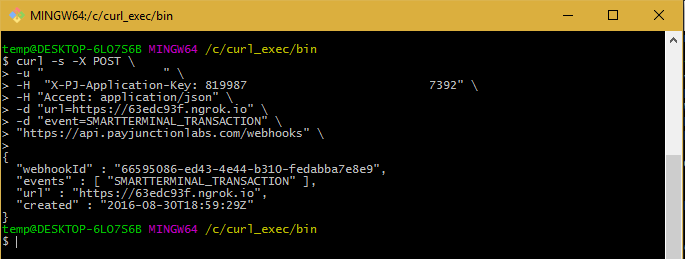
For more information on setting webhooks in PayJunction please see https://developer.payjunction.com/hc/en-us/articles/219594068-POST-webhooks
Step 5: Run a test transaction on the Smart Terminal
We should now start receiving notifications of completed transactions on our webhook:
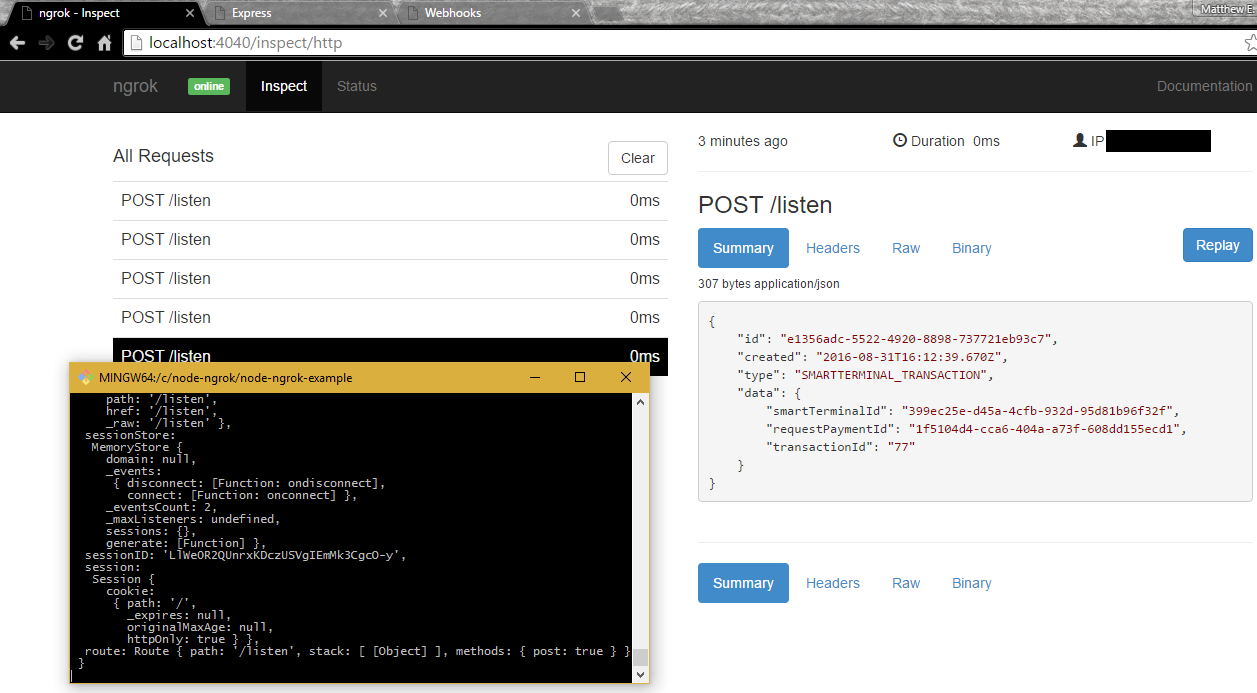
We're receiving our webhook data, but it keeps being sent. Notice that we're not showing a status code on these requests in the ngrok web console. This means that our service is not responding to PayJunction's server to let it know the data was successfully received. Let's check our code:
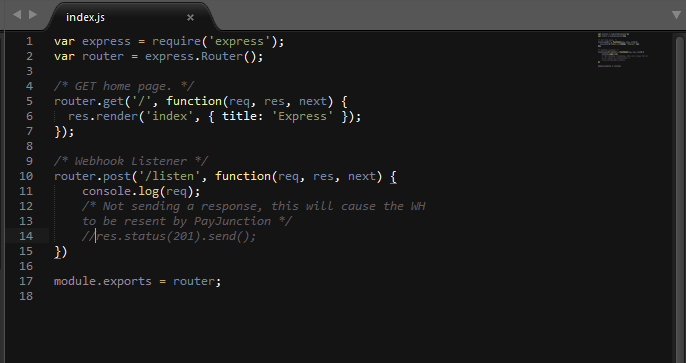
As expected, not sending an HTTP status code of 2xx in response to receiving the webhook has caused PayJunction to keep resending in the hopes it gets through as described in https://developer.payjunction.com/hc/en-us/articles/218162118-POST-smartterminals-smartTerminalId-request-payment
Let's fix our code to send a successful HTTP status code:
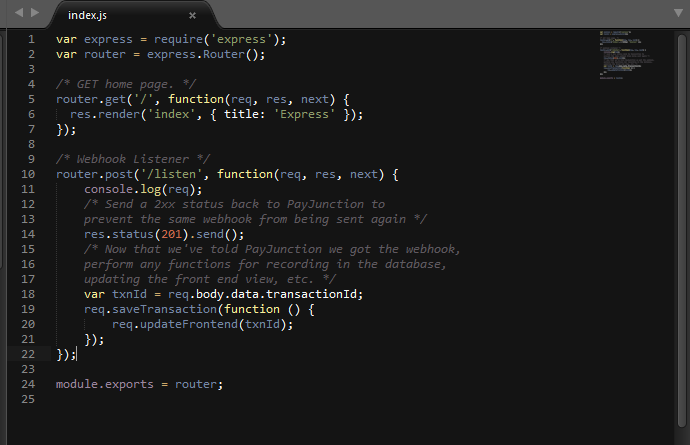
Notice that we responded to the PayJunction server first before we start performing time consuming tasks like updating the database and the front end view. This should prevent duplicate reception of a webhook in most cases, which can eat up resources as the data is checked against your database repeatedly.
Now that our server is going to respond properly, the next webhook we receive will be the last one sent until we run a new Smart Terminal transaction:
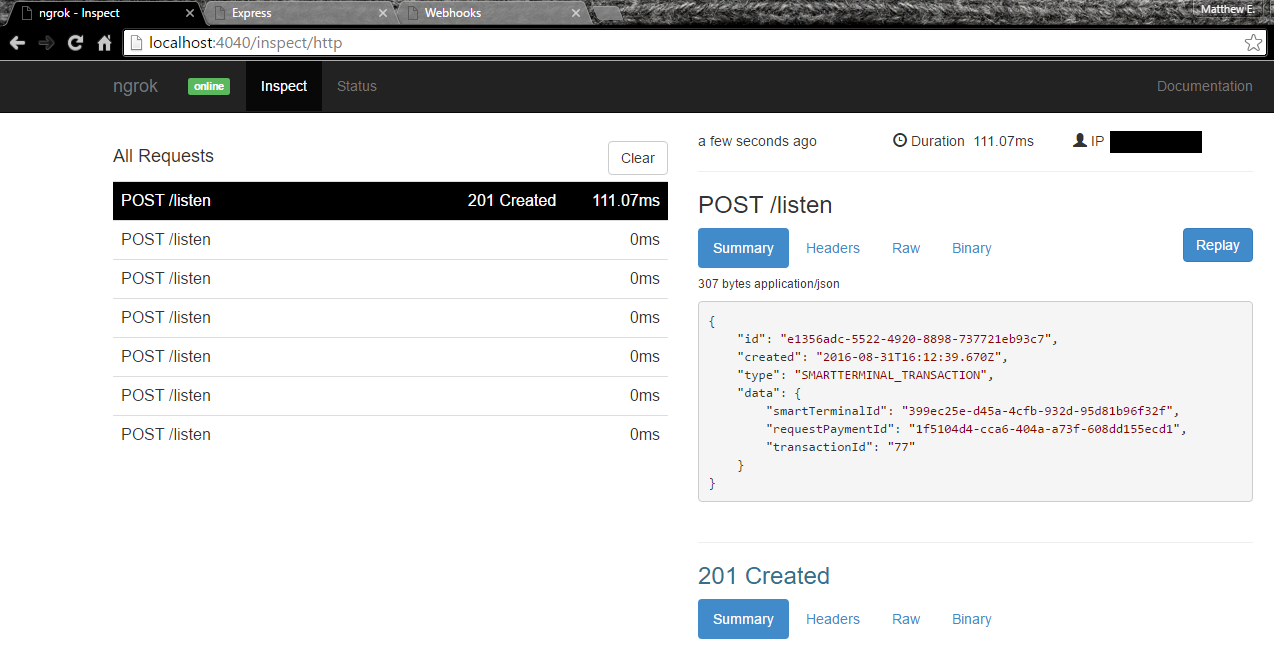
A handy feature of ngrok for testing webhooks is the Replay button which prompts ngrok to resend the selected request again to your local server. This is particularly nice in the early stages of development, allowing you to build and debug your webhook handler without having to continuously run test transactions on the developer Smart Terminal. This also works well to test that duplicate webhook requests are not accidentally processed and saved in your database once that part of your handler has been built.